

How To Create A Social Media Site
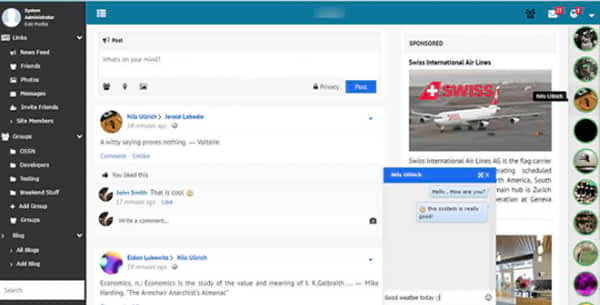
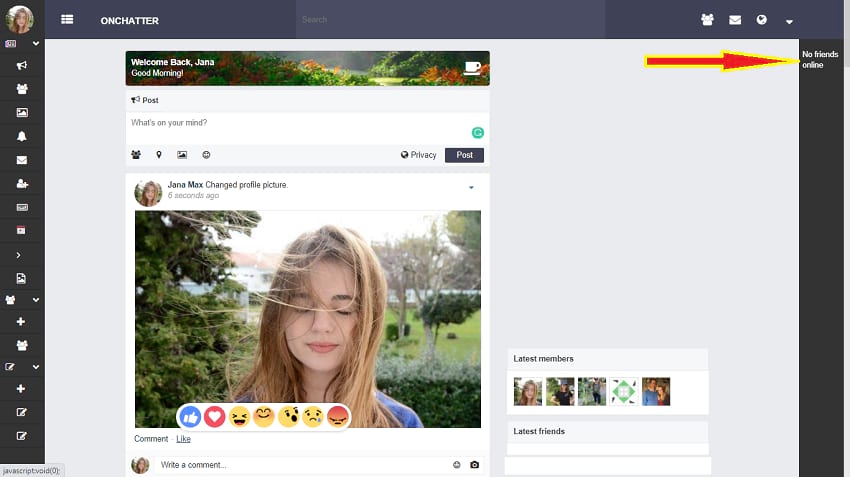
You will be able to make the type of website as shown in the screenshot below.
No skill is required because of today's advanced and easy web-building applications.
Do you want to create a social networking website like Facebook? Or you want to build a social media site? But you don't know where to start or have no coding knowledge? It is easier than you think..!
You don't need to learn programming or anything extra – just follow the steps below. You can create your own social networking websites like Facebook for your college or organization or public or, in short, any type that you want!
Today we have advanced software & tools – everything made easy. You can customize settings within the social website as per your imagination to change the functions or anything. Just a few clicks are enough to do everything you want! You can even build a social website that makes money fast by using Google Adsense or any sponsored ads or games or subscriptions or any other proven online earning methods.
You don't need to learn Web programming like HTML, CSS, JavaScript, PHP etc. You can easily make money from your website. There are many people already making plenty of money from their websites, but it depends on how you work to make your website popular. Creating a website is easy – but marketing is difficult.
My real life story (In short) : When I was a college student, I became a big fan of Facebook founder Mark Zuckerberg & I wanted to create something like Facebook. I launched a social website in my college publicly at the age of 19 simply because Zuckerberg also launched at the age of 19! I followed what Mark did when he launched to ensure the success of my site. My website event was published in the newspapers! It became popular suddenly, but I failed to make it continue while studying in the college. At that time I didn't know how to marketing and business. My website gained 100k+ users after the big news & made some money, but I was a shy guy and failed to hire people to manage and marketing it. At the same time, I took another project (Right now I am working on that, Soon I will launch) In my final year exam I just shutdown the website. Now my social network website is not live.
This is my news story, as appeared in the Deccan Herald.

If you are interested in my life story, See – How I Created a Social Network Website & Made A Huge Profit In 26 Days.
Note: In the newspaper you see that they reported I made $80k investment. But in reality, it cost me only $80 dollar to make the entire social website! Purposefully I lied as $80k in my launching program to make hype around it.
But that social website is not live now. Because I failed to make it popular. I made a bad marketing campaign. (I will talk about it later) Creating a Website is easy, but marketing is difficult. I created social websites using many techniques, and finally, I found this method to be the best.
There are several methods that you can use to create a social website. But most of the methods are old, difficult & outdated. Below, I've used the latest & easiest method.
There are many web applications and software options like WordPress, BuddyPress, Peepso Plugin, Ning, Socialgo, Kickapps, SocialEngines and so many tools. But today, I am going to guide you to the best method. With this method, you get all of the social network website ready-made web functions available in a single dashboard..!
Yes. All Facebook features, from user's profile to chat to groups to ads and 200+ more! You may get surprised!
You can also start to monetize to generate revenue. You can get Google Adsense, buy/sell marketplace within the social website, offer subscriptions, ads, etc. You can make money, but first, you need good traffic.
So, how to create a Facebook-like website? Just follow the 4 steps below.
Step -1:
1. Get A Bluehost Package
Go to Bluehost.com
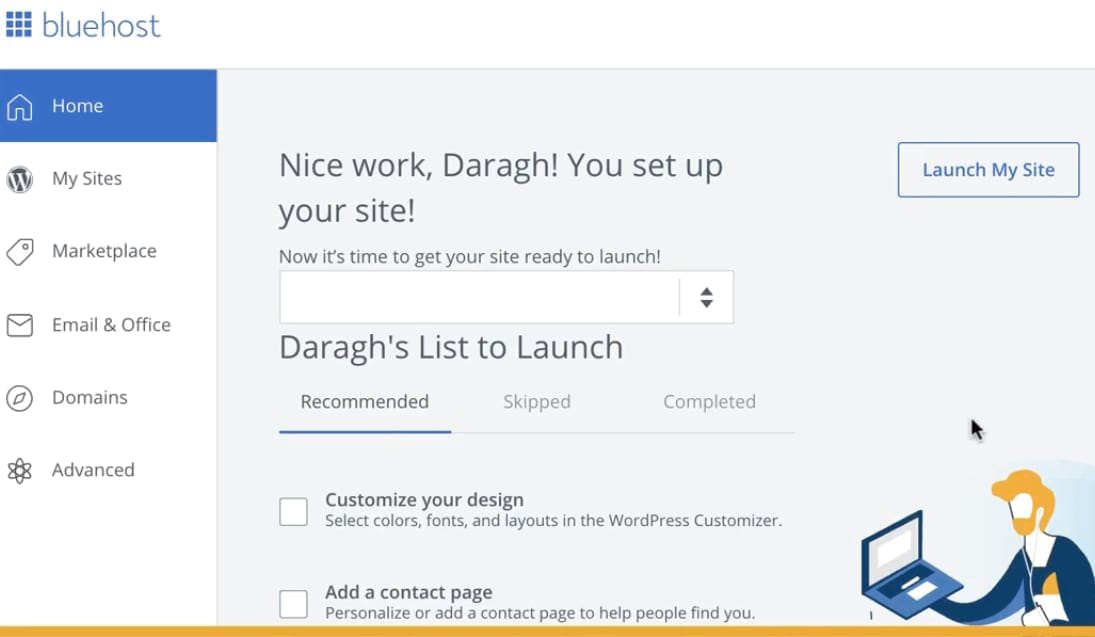
Once you have clicked the above Bluehost link, you will see this page.

Next, click the "hosting" menu, then click "shared hosting". Choose the Basic plan. In the beginning, the $3.95 plan is enough.
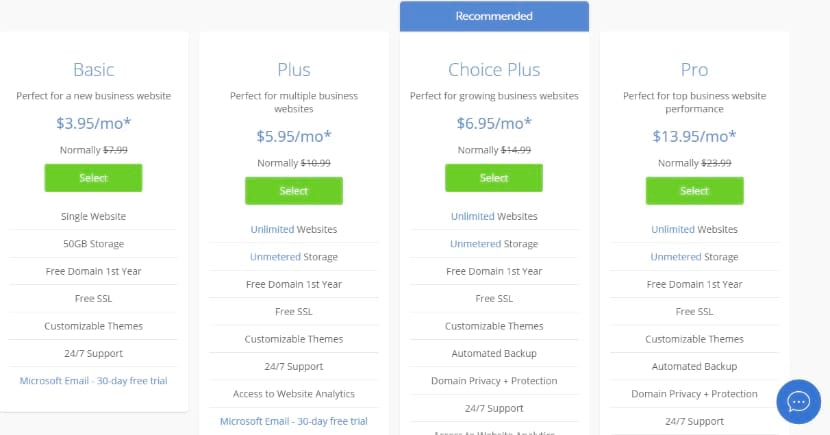
(If you buy for 1 month, then the cost will increases. $3.95/month if you buy for a year)
Don't buy the costly plan, because if your site gets millions of traffic then you can upgrade lateror transfer to any other hosting plan. There are many different plans. The basic plan is enough for your social networking site for now.
If you assume that your website gets less than 50,000 visits per month, then order the basic plan. If you assume you get high traffic suddenly, then I recommend the $6.95 choice plan even your website gets fewer visitors per month. If you get more or fewer visitors, you can upgrade or downgrade the plan at any time.
Once you've clicked Order, you will be prompted to enter your domain.
Here, I wanted to create a social network website for USA photographers. So I bought www.usaphotographers.club

The domain is your website name or URL address. Create your website name. Type any name you want to give your website. You are creating a social networking website, right? Personally, I think it is better to choose the .club domain extension instead of .com, .net, .org etc, as these domains are so boring and it can also be difficult to get the name you want. This is because these extensions are popular and there may be someone already registered with the domain you wanted with .com. You can give names like www.badboys.club, www.NewYorkUniversity.co, facebookhookers.site, www.usaphotographers.club etc.
Usually, the domain name costs about $10- $15 annually, but Bluehost offers a domain name for free.
Different domain name costs vary a little bit. For .com, the price might be $15, but specialist domains such as .academy are usually a little bit costlier than others.
If you want the .com domain only, then try with different words like photographersnetwork.com, etc. But that domain name was not available.

Try different ones. You can change the domain if you want. The important thing is, you have to get started.
I added "theusaphotographers.com". That domain name was available. So, I continued with that one.
Just enter the details. Give your email properly because all information & receipt will send to that email after you paid. Click submit.

Click "Submit". It takes some time. Once your transaction is completed, you will see a message saying "your purchase was a success".
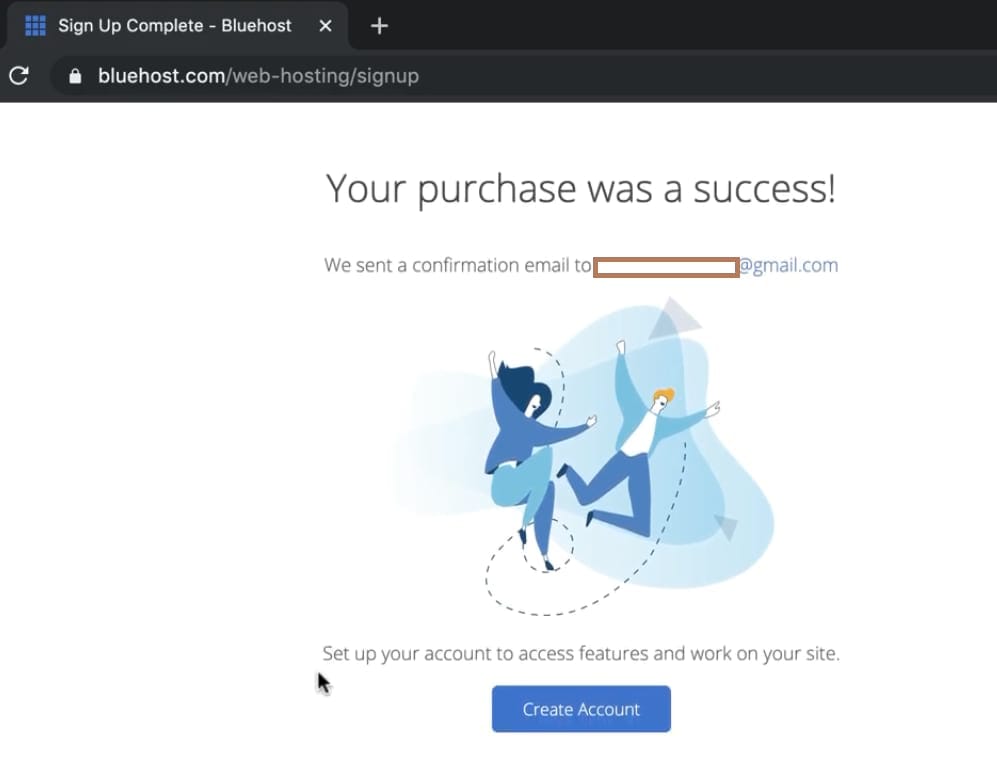
Click "Create Account". Now, a tab shows you with your chosen domain. Choose a strong password with 8 or more characters that includes at least one letter of lower & uppercase, number, and special character.
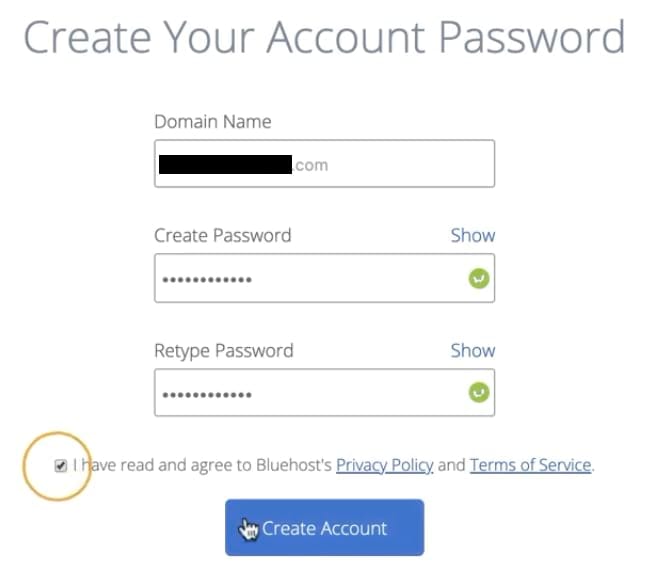
Once you click "Create Account", you'll see the login page. Just enter your domain name and password that you set just now while you creating your account.
Next, the "let's create a website" tab appears. Just enter your domain name & tagline. Click continue.
Now you see the "Tell us a bit about you" tab. Just check randomly. It doesn't matter what you check.
Continue. Then you see templates. Just go to the end of the page and click Skip.
Now you see your hosting dashboard.
Step -2:
2. Install Any Social Networking Website Software From Softaculaous
Go to the Advancedmenu that you can see on the bottom left side. Then, scroll down and find Softaculous.
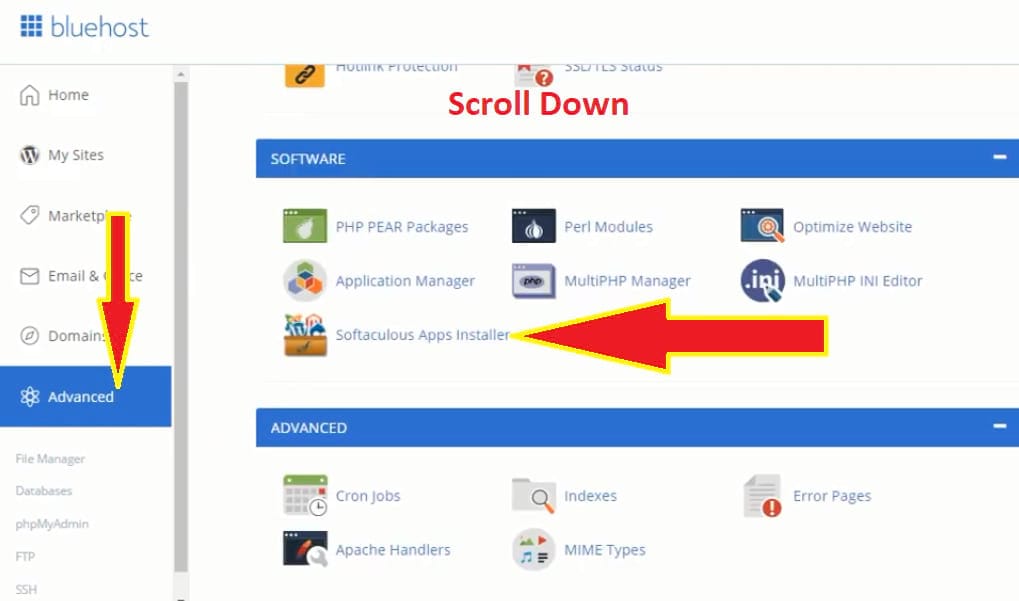
Click Softaculous, and then you will see lots of web applications.
Look at the left side of the menu. Click the Social NetworkingTab & click "Open Source Social Network"
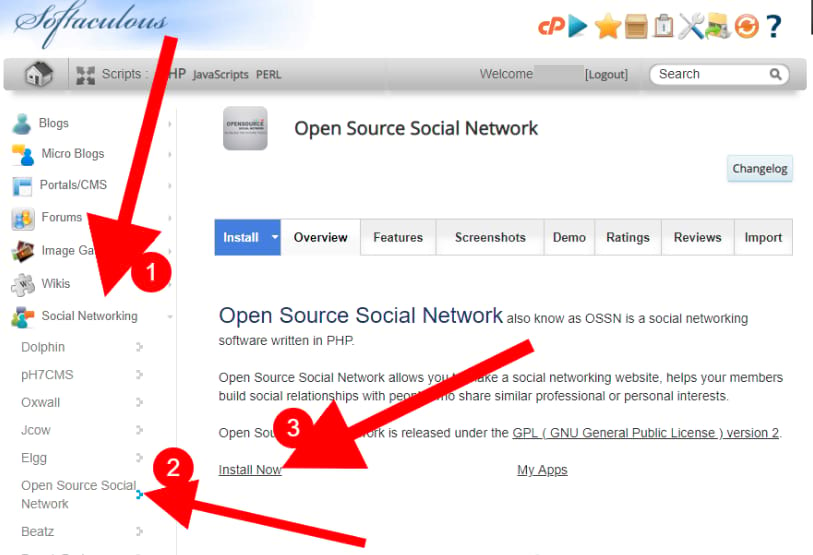
Under the social networking menu, you will see Dolphin, Oxwall, pH/CMS, Jcow, Elgg, Open source social network and more. " Open source social network" is completely free forever. Dolphin is a premium software and gives you a 15-day free trial only. In this example, I selected "Open Source Social Network" software because it is free as well as being a really great web application with all of the necessary Facebook-like features.
You can select any software. You can see the demo. Don't worry; even if you choose a different software, the method is exactly the same as below. You can change any software or take backup & restore the original. (That I will explain later)
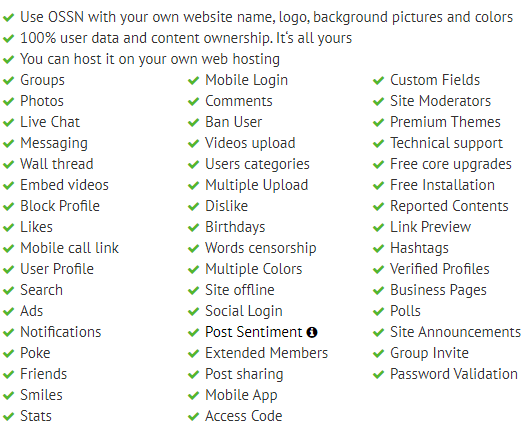
Main features of OSSN (Open Source Social Network)
- Realtime activity notifications, newsfeed, instant chat
- Photo, Video sharing
- Blogs, forums, wiki
- Groups, events, friends
- Comment, tag, rate any kind of content
- Privacy and profile customization
- Collaboration, file sharing, video-conference tools
- Ads (You can make money from this feature)
- Polls
- Site announcement
- Group Invitations
- Two Factor Authentication, Password Validation, GDPR
- First-time login custom functions – Redirecting first users with different pages to make them understand about the website.
- Feedback
- Audio, Video Call
- Halloween like effects
- Popular posts
- Site Moderations
- Custom user fields
- Verified Profile
- Link preview
- User points
- Hashtags & topics
- Flagging or reporting inappropriate content
- File Sharing
- Auto login
- Paid Access
- Share post
- Fan & Business page
- Forum
- Server Migration
- Events
- Access Code
- Private network
- Notification via email
- Login With Mobile number
- Site Offline
- Social login like Login with Facebook, Twitter, Google.
- Account list by gender search
- Blacklist word or bad word censorship
- User Categories
- Upcoming birthdays
- Ban users
Once you've clicked on "Open Source Social Network" , then you will see this page.Admin username & password are very important. Write down.
Follow the red arrows.
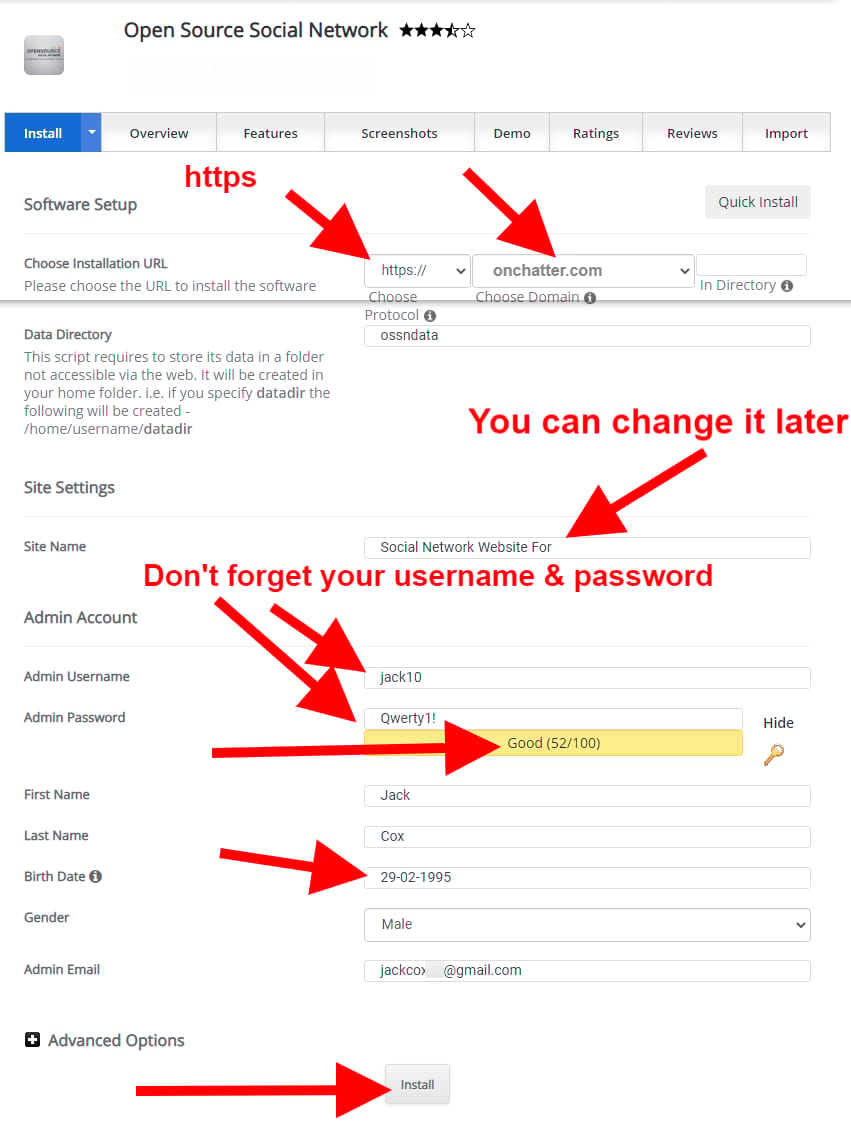
Sometimes you may get the "A trusted SSL Certificate was not found" notification. In that case, just contact Bluehost support or you need to turn on SSL from your Bluehost dashboard – my sites – hover on your site box icon – then you see manage site option, click it – go to security tab – there you will find the SSL turn on the switch. Turn on SSL & come back to install OSSN. If you don't understand, then just ask the Bluehost support. They will help you for free.
Next, click the install button. It may take up to 1 minute. You will see the progress bar. Once the installation has finished, then you will see your admin login URL. The username & password are the same as those which you typed above.
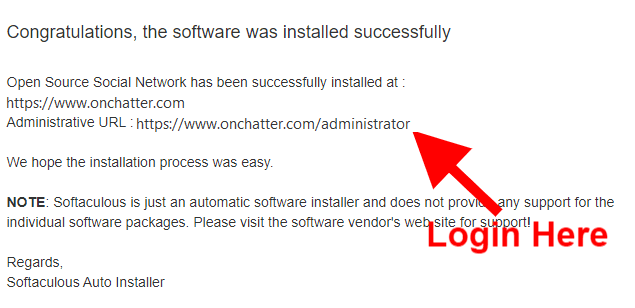
It may take up to a few minutes. Once the installation has finished then you will see your admin login URL. The username & password are the same – which you typed above. If your domain name is mysocialsite.com, then usually the login will be mysocialsite.com/administrator
Next, enter your username & password.

Next, you will see the dashboard. You are the admin of your website. You can change anything on your website.
You can click on the homepage to see the real version of your own Facebook website! You will see something similar to like this.
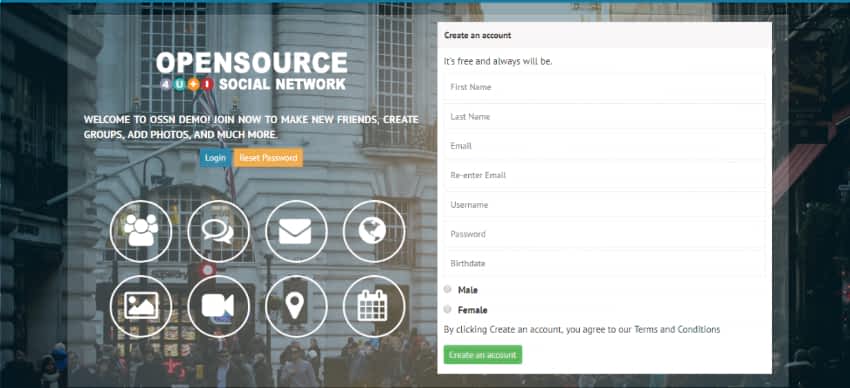
You can change it like this also.
Step-3:
3. Get Started With Your Own Social Website That Exactly Looks Like Facebook
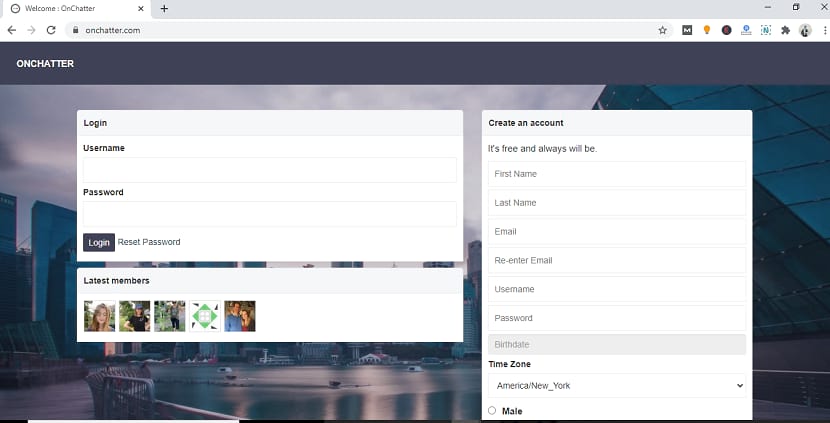
After you've signed up, you will see your own website that looks very similar to Facebook! (This is an onchatter.com website screenshot, which was created by Dave Caldwell by following this guide)
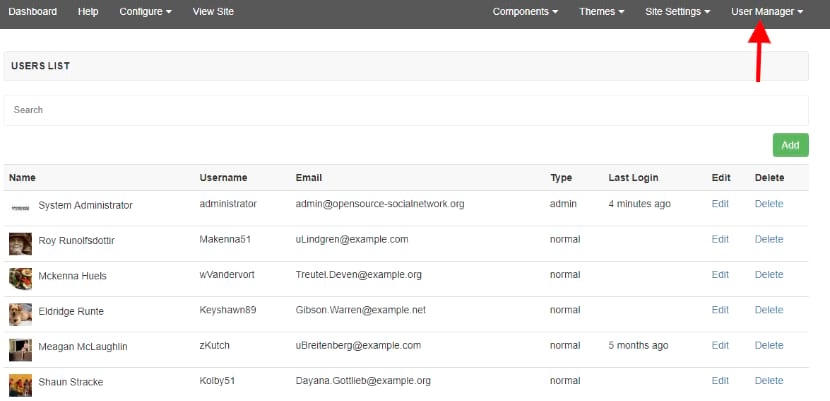
Here are the essential social profile features. You can control all users' profiles or activity. You can ban or delete anyone's account because you are the owner of the social website and you have 100% control over the website!

You can control all your users from the admin dashboard.

Now you can share your own Facebook-like website with your friends..!
Step 4:
Promote & Generate Revenue – You Can Easily Make Money From Your Social Network Website
So, how can you make money from your version of Facebook?
Before thinking about it, you have to get good traffic.
Launch publicly in your college. Share it with your friends. Give credit points for sharing (using the OSSN user points program) and try to make the news on local newspapers. Attract kids by sharing funny videos on your website.
Contact celebrities & ask them to share it on their social media. You get a really big boost for your website by using the celebrity method marketing. You can easily get affordable pricings from Instagram models, TikTok stars, or YouTubers.
If you can get to 100k visitors, then you may become a millionaire before long!
Once you get good traffic, then you can make a profit from various ways:
- Google Adsense (you can easily display ads all over your website in a single click & immediately you start to earn money if you get good traffic)
- Your own Ad system (OSSN offers this ready-made ad function just like Facebook)
- Paid Access for premium members
- Selling stuff or integrating Amazon associate commission program
- Premium community services
- Selling games, Ebooks, etc.
- Once you get good traffic, for example 1000 visitors/day, then your website valuation increases. Sell your entire website. (I did this one –How I Created a Social Network Website & Made A Profit In 26 Days)
If you build your website for a niche community, particularly for Musicians or Photographers or Business, then you can attract many people and generate a significant profit. Once you get enough traffic (atleast 1000 visitors /month) then you could try to apply for Google Adsense. Otherwise, Google may not approve. You can sell items for Musicians or any particular niche.
You can control your social site users here.
You can add many premium features. After you get some accounts then it will look like this screenshot. You can add sponsorship options and generate an income.
Yup! Share your website with your friends and get traffic.
If you have any doubts, comment below & get a response within 24 hours. If you've got any problems while you are installing your social website then you can also get support from Bluehost. They provide you 24X7 live chat support & a ticket system. I suggest the ticket system because you can view it anytime. By contrast, in chat, once you close, everything will be deleted.
All the best for your social network website.
Your favorite tutor, Jack
Visit Bluehost & Create Your Own Social Website
Like Facebook
Visit Bluehost &
Create Your Own Social Website
Like Facebook
If you are not satisfied with your website or OSSN, then follow the 2nd method.
Another Best Method To Create a Social Networking Website
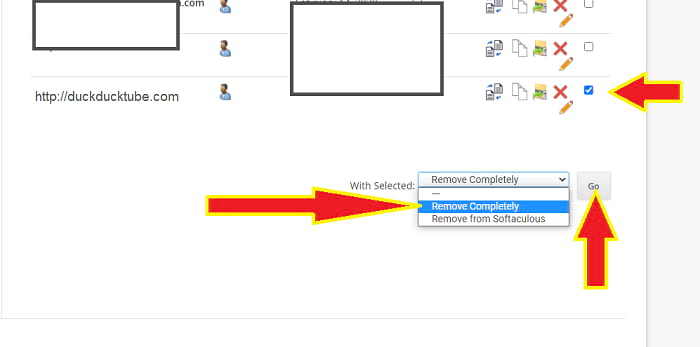
Important! : You can Uninstall or Delete Your OSSN Website & Install New Software On The Same Hosting & Domain In 3 Clicks Without Loosing Your Money.
Note: If you already installed OSSN, then you should uninstall OSSN before you install Wowonder. Then you can use the same Bluehost Hosting for your new website. So that you don't have to purchase a new hosting or upgrading the hosting. It will save your money.
Go to Bluehost Dashboard – Advanced – Softaculous – Installs – Select your website – Remove completely – Click "Go" As shown in the screenshot arrow marks below
This is another best method. You may feel a bit difficult than the first method, But if you follow the guide below, it will be very easy.
I hope now you already have Bluehost hosting and deleted your OSSN website. (If you still not have Bluehost, then Follow the exact steps as I explained in the first method) .
Step 1 – Get Wowonder
Step 2 – Go to Bluehost Dashboard -> Advanced tab -> File manager -> Upload & Install Wowonder on Your Bluehost. That's it!
Watch the video below. Step by step from the beginning to the end how to install Wowonder in Bluehost file manager.
My Final Thoughts:
Since OSSN free version offers all the basic social network features, I recommend Bluehost OSSN if your budget is around $70
There is no Wowonder free version.
However if you want to buy OSSN paid version ($219), then don't buy it!!. Instead buy Wowonder.($50) OSSN paid version is not good. Wowonder is the best premium social network package.
Bluehost ($70 ) + Wowonder ($50) = $120.
Any method you choose, The first thing is to sign up on Bluehost, Get experience on its dashboard. Eventually you will understand what to do.

Hi… I am Jack, Co-founder/Editor at WebsitebuilderLy, An entrepreneur with 12 years of Website Creation, Management, Marketing Automation & App Development Experience.
How To Create A Social Media Site
Source: https://www.websitebuilderly.com/make-websites-like-facebook/
Posted by: hensleyamosout.blogspot.com
0 Response to "How To Create A Social Media Site"
Post a Comment