

How To I Test Ma Draw On Arduino
Tutorial: How to measure current consumption and why should yous practice it?
| Please put some money in the tip jar by clicking on the donate push to support me so I can continue creating debate like this. P.S. please donate more than $1 every bit PayPal takes minimum $0.30 per transaction |
A lot of makers don't know how important it is to know the current depict of your projection, or why yous demand to know this. In this tutorial I will explain to you how to measure out the current draw of your projection, and why information technology is then important to know this.
I oft become asked the question of what blazon of power supply to use for projects. Virtually of united states know the voltage required, but how much current information technology draws and why you need to know this is a mystery to many beginner makers. To starting time with what is this current thing? "In comes the illustration that uses the menses of water to explain these things".
Let's say that a battery that we use to power our project is a bucket of water with a hose attached to it. The water pressure at the end of the hose is what we consider the voltage. The speed the water runs through the hose is the current and that is measured in Amps.
Yes this never made sense to me either. Information technology comes downwards to this if your project consumes more current and so your power supply has to offer it won't run, and can even damage your power supply. We measure out current in Amperes or Amps for curt (Symbol used is A).
One way to roughly effigy out what power supply to employ is by reading the documentation of all the components used in your project, and encounter their current draw (how much Amp(A) or milliamp(mA)). Add these numbers upward and you roughly know what the amperage your power supply needs to be.
Note of caution: If yous utilise your laptop USB to power your projection yous could damage your USB port if the current depict is too high. This is why it is a expert do to have an external power supply to ability your projection, even when you have a USB cable connected to your Arduino.
MATERIALS NEEDED IN THIS TUTORIAL
The other manner to find out the current draw is by using a multimeter. Follow the these steps to setup your multimeter for this practise:

Step 1) Look at the bottom of your multimeter you will notice 3 or 4 ports where yous plug your probes in to. The black probe plugs into the COM port (COM stands for mutual ground). The blood-red probe for this exercise should exist plugged into the port with the A symbol (or 10A or something like).
Note of caution: Multimeters have a limit on how much Amperage a port they can handle. Most probable your multimeter too has a port that measures the current in mA. I normally don't use this one as it is then easy to damage if yous don't watch it, and y'all yet get enough precision through the A port.
Step ii) Plough the dial of your multimeter to A and apply the DC mode. Some multimeters will accept multiple A options on the dial. Nosotros are using DC (direct current), wait for an A with this symbol backside it .
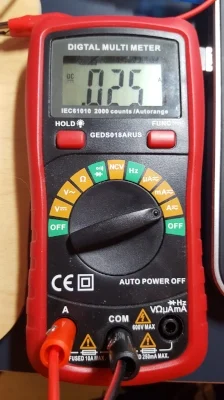
Step three) Next using the adapter we connect the red probe from your multimeter to the plus (+) terminal of your power supply. Connect the black probe to the Vin on your Arduino Uno. Finally connect the GND on your Arduino Uno to your ability supply minus (-) concluding. This is chosen putting your multimeter in in series, or in line with your ability supply.
Your setup should look a little like effigy ane. You should now see how much current your project requires.
Note: Some components require a start-upwardly current (DC motors are bad for this). Your multimeter might not be fast enough to annals this, and might not find this if the ability supply can handle this. This happened to me when I started using my desktop ability supply. I had a DC motor that needed 3A electric current to start, subsequently it was running the electric current utilize dropped back to nether 1A.
Another good reason for knowing how much current your project uses is when yous endeavor to run it of a battery pack. Most USB battery packs are graded (the Capacity ) in milliamp hours (mAh). To effigy out how long it will last all y'all need to know is its capacity and how much current your projection draws. All you lot accept to do nexts is following this simple formula:
Separate the bombardment pack capacity in mAh by the projects current draw in mA. If yous have a battery dorsum that provides 16750mAh and your project consumes 32 mA just divide 16750mAh by 32mA

With a bombardment pack with a chapters of 16750mAh and a project consuming 32mA has a runtime of well-nigh 523 hours. Simply a disclaimer; this is not precise in anyway. Ecology factors like temperature have a large impact on the actual run time. Another factor is the quality of the power cells used in your battery pack. All battery packs volition offset to discharge quicker every bit it loses charge, some might also have voltage drop. So the moral of this story is that y'all have to run a test to see the actual run fourth dimension, the calculation will give you a proximate value only.
In Closing
Knowing your projects electric current consumption tin can make certain you get the right power supply for your project, reducing the gamble of ability supply failure or unexplained freeze ups of your project. It can also help yous effigy out what battery pack yous demand for your project.
If you lot like this tutorial and would like to see more of the same type, please subscribe to my newsletter using the form below or similar my Facebook page. This way you get notified when a new postal service is available. If you have questions or suggestions delight electronic mail me or get out information technology in the comments below. Take a great solar day and meet you side by side fourth dimension.

How To I Test Ma Draw On Arduino,
Source: https://thekurks.net/blog/2018/1/4/measure-current-consumption
Posted by: hensleyamosout.blogspot.com
0 Response to "How To I Test Ma Draw On Arduino"
Post a Comment